
SELF-INSTALLATION GUIDE
Instructions for ThinkDesign 2015 e later versions


DOWNLOAD
Access the DPTCare website using your credentials.
Select the Download tab and choose the version of ThinkDesign you wish to download.
INSTALL
To extract all files from the downloaded .iso file:
a. In Windows 10 or 11, simply right-click the .iso file and select Open with Windows File Explorer.
b. In Windows 7, use the utility program 7-Zip (available online for free download).
Run as Administrator the DPT_TD_Setup.exe file located in the folder where you extracted all the files.
Follow the steps in the Setup Wizard to complete the installation.
During installation, you will be prompted to enter your Account Number. You can find this code in the top-right corner of your account on the DPTCare website.
After running the program, if the "Valid license not found" error message appears, you will be redirected to the Sentinel Admin Control Center (ACC) at http://localhost:1947.
To activate your license, you must first generate the .c2v (Customer-to-Vendor) file.
OPTION A
If you downloaded ThinkDesign 2018 or a later version, a .c2v file will be automatically created on your Desktop during installation. The file will be named after your machine, followed by a code number (e.g., PC-John_110137.c2v).
OPTION B
If you installed a prior version (2015-2017), follow these steps.
Run as Administrator the executable file DPTGetC2V.exe located in the ThinkDesign installation folder (e.g., C:\program files\think3\2016\common\utilities).
A command prompt window will appear, indicating the folder where the .c2v file has been saved, which is usually the Temp folder.
If you’re having difficulty finding the .c2v file, follow these steps:
- Click Start and select the Run command.
- A dialog box will appear with a search bar. Type %temp% and click OK.
- The Temp folder will open. Sort the files by "Date Modified". The first file in the list will be the .c2v file you're looking for.
ACTIVATE
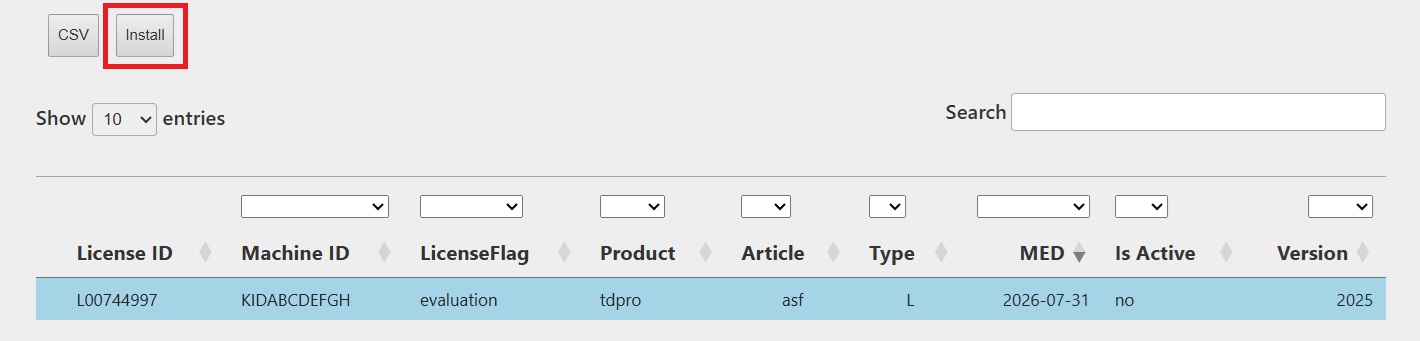
In the Licenses tab of the DPTCare website, select the row of the license you want to activate (do not click the green cross button; click the row itself), then click the Install button in the command bar.
A new tab will open (note: you may need to allow pop-ups). Follow the on-screen instructions and select the version you need.
You will then be prompted to upload the previously generated .c2v file. Once selected, click the Submit button.
You will receive an email with a .v2cp (Vendor-to-Customer) file.
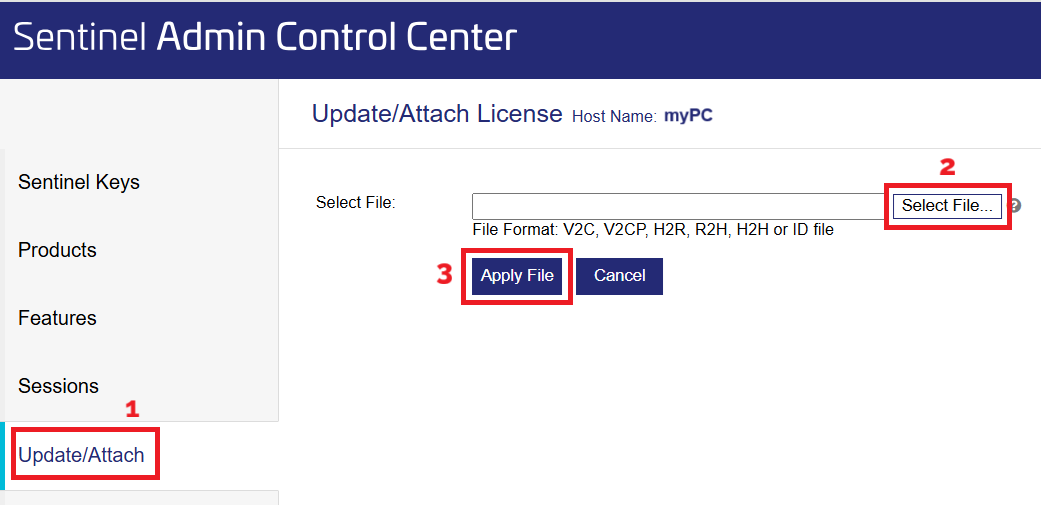
Attach the file to the Update/Attach section in the Sentinel ACC (http://localhost:1947).
RENEW, UPDATE OR CHANGE VERSION
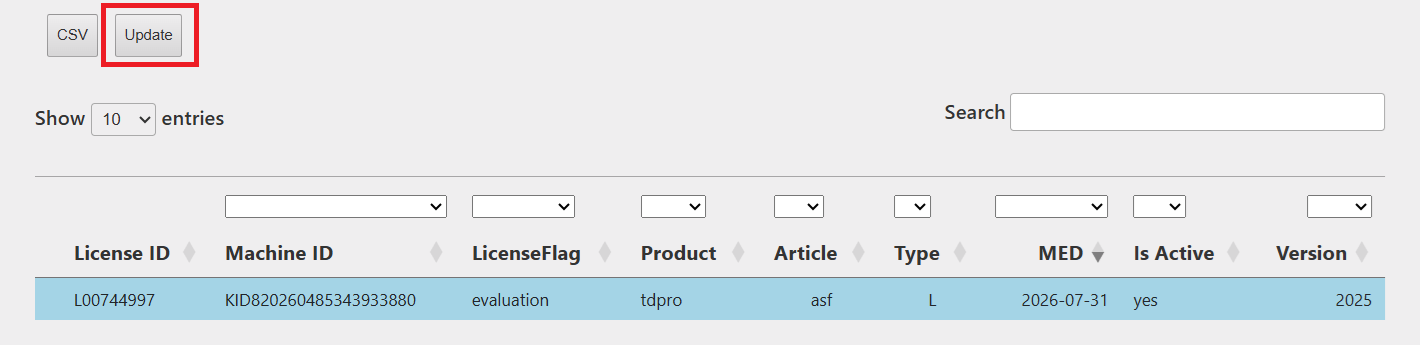
In the Licenses tab of the DPTCare website, select the row of the license you want to update (do not click the green cross button; click the row itself), then click the Update button in the command bar.
A new tab will open (note: you may need to allow pop-ups). Follow the on-screen instructions, select the version you need, then click Submit.
You will receive an email with a .v2cp (Vendor-to-Customer) file.
Attach the file to the Update/Attach section in the Sentinel ACC (http://localhost:1947).